Today was the day to start installing the crossfencing in the pasture. This will allow us to seperate the land into 2 main sections, one for horses and the other for sheep. It will also make easier the subdivision of each section for proper pasture rotation and watering in the summer. Our chosen fence design is simple T-Posts with wire field fencing. To cross fence the entire pasture will require about 400 feet of wire and about 30 to 35 posts. Add to that at least 2 wooden posts cemented in for a strong end post and to hang the gate. Going into the project there is one fear. The ground here is very shallow. the "hardpan" layer is at times only a couple of inches below the topsoil, and this hardpan is virtually impenetratable. It takes at least 6 to 8 inches of depth to properly sink a T-Post, so we could run into problems.
Fortunately we placed all but 4 of the posts quite easily, sinking them deep enough without problem. But that leaves 4, near the creek. In fact 1 is near the bottom of the creek and still sitting underwater from recent rains. So off we go into the adventure of breaking hardpan. I am told that the traditional way of doing this involved plenty of dynamite. Obviously that isn't an option today, and heavy equipment is out of the question due to limited availailability and cost. So, we try eveerything else we can think of.
Round 1: Pickaxe
We start off the old fashioned way. Taking turns pounding the ground with a pickaxe. While this approach does look impressive, it is tough work and not very effective. After the first inch or so of hardpan the pick just bounced off the hardpan.
Round 2: The Posthole Digger
Next appraoch is to try the posthole digger with an extra-aggressive bit. While it digs produce a fine dust of drilled dry clay, there was just no appreciable progress. Perhaps what is needed is a little more down-pressure!
Round 3: Weight on the posthole digger
DO NOT EVER DO THIS! It is not smart, very dangerous, and besides.. it doesn't work. Even 2 men dont have enough weight to make any difference. What we need is a new, creative idea.....
Round 4: Hydraulics and a semi-sharp object:
So perhaps the a single fork on the end of the bucket will have enough force to break through...
 Or not.
No change.
Round 5: The Electric Drill?
Yes, a new and crazy idea... use an electric drill with a concrete bit to drill holes in the hardpan, and then break it loose with a pick-axe.
This idea actually worked fairly well. After the pain of laying 300 feet of extension cord, we were able to drill through the hardpan quite easily. Making 4 holes in a circle and hitting it with the pick allowed us to break a bit further. Problem is, this wont work well for the holes underwater in the creek, and it takes a LONG time and a lot of work with the axe. Is there a better idea?
Round 6: Getting to the point
While talking to my neighbor to see if he had a generator I could borrow, he came up with a new idea. He had the same problem, but got through it by cutting the end of the T-Post to a point with a plasma cutter and pounding them in. This sounded reasonable so why not?! I carried down 4 posts and he was good enough to cut them like he had done his. Before leaving, I borrowed the generator just in case this idea didn't work.
The post in the deepest ground benefited from this approach, and I was able to pound it just deep enough to hold. Unfortunately, the other 3 would not budge and the point just dulled... on goes the search for a solution.
Round 7: Success!
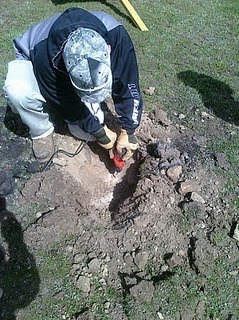
Believe it or not, this worked very well. What a setup! I borrowed a generator from the neighbor, which is stapped to the forks of the tractor. That drove the portable air compressor from my shop, which then powered a hand help air chip away at the hardpan quite easly. Even the holes in the water could be mostly emptied and then dug out this way. It took a while but wasn't particularly difficult.
We cemented the t-posts in the slighlty larger than necessary holes and they all ended up at about the right depth and height. I can't say whether this will last over time, but it seems sufficient.
Conclusion:
At the end of a very long day, we had the fence line in place. Once the cement hardens we can attach the wire. The question is whether my aching back will be ready in time!


 Or not.